Last year, when I finally bought my little piece of paradise in Daman, I had no idea what I was getting myself into with the electricity connection process. Three trips to the DNHPDCL office, countless forms, and one very patient customer service representative later, I’ve become something of an unwilling expert on getting power connected in DNH and DD regions.
For those of you about to embark on this adventure – whether you’re building a new home, opening a business, or just moved into an area served by the Dadra & Nagar Haveli and Daman & Diu Power Distribution Corporation Limited (that’s DNHPDCL for those of us who don’t want to break our tongues) – I’ve put together this guide based on my own experiences and what I’ve learned helping my cousin through the same process last month.
Before You Start: Documents You’ll Need to Round Up
First things first – let me save you that embarrassing first trip I made where I showed up with just my ID and a smile. Big mistake! Here’s what you actually need to gather before you even think about applying:
- Proof of ownership: This could be your property deed, sale agreement, or rent agreement. In my case, I had just the sale deed, which worked fine. My neighbor tried using just the tax receipt and got turned away.
- ID proof: Your Aadhaar card works best, but voter ID, passport, or driving license will also do the trick. I brought both my Aadhaar and passport just to be safe.
- Address proof: This one tripped me up initially! Even though I had ownership papers for my new place, they wanted address proof. I ended up using my bank statement since it had my new address on it.
- Recent passport-size photographs: They asked for two copies. I brought four because… well, government offices always seem to need more than they initially say.
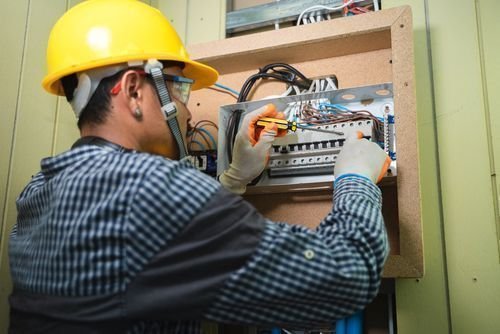
- An electrical contractor’s test report: This one was a surprise! You’ll need to get a certified electrician to check your wiring and provide a report. My electrician charged me ₹1,500 for this service, though prices vary.
- Site plan/building approval: If it’s a new construction, you’ll definitely need this. I had to dig through mountains of paperwork to find mine!
The Actual Application Process: My Journey
Step 1: Finding the Right Application Form
You’d think in 2025, everything would be digital, right? Well, yes and no. DNHPDCL has started offering online applications (hallelujah!), but I found the paper route actually moved faster in some cases.
For online applications, visit the official DNHPDCL website. Look for “New Connection” or “Apply Online” – it’s usually right there on the homepage, though they redesigned the site recently and I had to hunt for it a bit.
For offline applications, you’ll need to visit your nearest DNHPDCL office. Mine was about 12 km away in the main town. The form is called “Application for New Service Connection” and it’s free of charge.
Pro tip: Go on a Tuesday or Wednesday morning if you can. Mondays are always packed, and by Thursday everyone’s rushing to get things done before the weekend.
Step 2: Filling Out the Form (Without Losing Your Mind)
The form looks intimidating at first glance – it’s four pages long! But much of it is straightforward:
- Personal details: Name, contact info, etc.
- Connection type: Domestic, commercial, industrial, etc.
- Load requirement: This is where I got stuck. How much electricity would I need?
I wasn’t sure about the load requirement, so I asked the electrician who did my wiring. For my 2BHK apartment, he recommended applying for 4kW. Your needs might differ depending on the size of your property and how many heavy appliances you plan to use.
When it came to the “purpose” section, be specific but brief. I simply wrote “Residential usage for self-occupied 2BHK apartment.”
Step 3: Submitting Your Application & Paying Fees
Once you’ve filled everything out, double-check all your details. My first application was returned because I’d accidentally put my old PIN code out of habit!
Submission options:
- Online: Upload scanned copies of all documents along with your completed form
- Offline: Visit the DNHPDCL office in person
I chose the offline route because I wanted to make sure everything was in order. The office was busier than a railway station at rush hour, but the staff was surprisingly helpful.
At the time of submission, I had to pay:
- Application processing fee: ₹50 (might have changed since then)
- Security deposit: This varies based on your load requirement. For my 4kW connection, it was about ₹3,000
Important note: They prefer online payments now, even at the office. I used my debit card, but you can also pay via UPI. If you’re determined to pay cash, you’ll need to visit their designated cash counter.
Step 4: The Technical Feasibility Study (Or: The Waiting Game)
After submission, DNHPDCL will conduct what they call a “technical feasibility study.” Basically, they send an engineer to check if your location can be connected to the grid without major issues.
In my case, this took about 5 days. My cousin who lives in a more remote area waited nearly 2 weeks. The timeframe really depends on your location and how busy they are.
The engineer called me the day before he planned to visit. Make sure your phone number on the application is one you actually use! I almost missed the call because it came from an unknown number, which I usually ignore.
Pro tip: If more than a week passes without any contact, don’t just wait around hoping for the best (like I did initially). Call the customer service number or visit the office. Sometimes applications get stuck in the system.
Step 5: Approval and Meter Installation
Once the feasibility study is complete and your application is approved, you’ll receive a demand note outlining:
- Connection charges
- Meter cost
- Any additional infrastructure charges (if applicable)
For me, this came to around ₹2,800 total, but costs vary widely depending on your location and requirements. If your property is far from existing power lines, it could be significantly more expensive.
After paying these charges (again, online payment is preferred), I scheduled the meter installation. They gave me a time window of 9 AM to 5 PM – basically, “We’ll be there sometime during business hours!” I took the day off work just to be safe.
The technicians arrived around 2 PM and had the meter installed in about an hour. They were efficient and even helped explain how to read the meter, which was a digital one.
Common Mistakes That Delayed My Application (Learn From Them!)
- Incorrect load estimation: My friend applied for just 2kW for his 3BHK house with AC and ended up having to reapply later. Be realistic about your needs.
- Missing documents: Triple-check the document list before heading to the office.
- Not following up: The system isn’t perfect. My application sat untouched for days until I called to check on its status.
- Wrong form type: There are different forms for temporary and permanent connections. Make sure you’re filling out the right one.
- Illegible handwriting: This sounds silly, but the clerk pointed out several applications that were delayed simply because they couldn’t read the applicant’s writing. Type it out if your handwriting isn’t clear.
Extra Tips From Someone Who’s Been Through It
- Make friends with the office staff: A little courtesy goes a long way. The lady at the front desk actually called me personally when my approval came through earlier than expected.
- Keep digital copies of everything: Scan all your documents and the submitted application. I needed to reference mine twice during follow-up calls.
- Consider hiring a facilitator: If the process seems overwhelming, there are agents who can handle the application for you. They charge around ₹1,000-1,500, but it might be worth it if you’re short on time.
- Check your wiring before applying: Make sure your property’s internal wiring is complete and up to code before applying. The DNHPDCL won’t connect power to unsafe wiring.
Timeline: What to Expect
From submission to electrification, my entire process took about 18 days:
- Application processing: 3 days
- Technical feasibility study: 5 days
- Approval and demand note generation: 4 days
- Payment processing: 1 day
- Meter installation scheduling: 3 days
- Actual installation: 2 days
Your mileage may vary, of course. My cousin in a more remote area waited almost a month from start to finish.
The Joy of That First Light Bulb
There’s something magical about flipping a switch in your new place and actually seeing the lights come on. After weeks of paperwork and follow-ups, that simple moment made it all worthwhile.
If you’re just starting this process, take a deep breath. Yes, it’s bureaucratic and sometimes frustrating, but with the right preparation, it’s entirely manageable. And trust me, that feeling when you can finally run your fridge, charge your phone, and watch TV in your new place? Absolutely worth every form you had to fill out.
Have you gone through this process recently? Was your experience different? Drop a comment below – I’d love to hear how it went for you! And if you found this guide helpful, please share it with anyone you know who might be moving to the DNH-DD region soon.
Frequently Asked Questions
Q: Can I apply for a commercial and domestic connection using the same process?
A: The forms are different, but the process is largely the same. Commercial connections typically require additional documentation regarding your business.
Q: How long does a temporary connection take?
A: Temporary connections (for construction purposes, events, etc.) usually process faster – mine took just 7 days.
Q: Can I change my load requirement later?
A: Yes, but it involves paperwork and possibly additional charges. Better to estimate correctly from the start.
Q: Do I need to be physically present for all steps?
A: You can authorize someone else with a proper authorization letter, but I recommend being present for at least the submission and meter installation.